-Mr Crafty
Monday, June 20, 2011
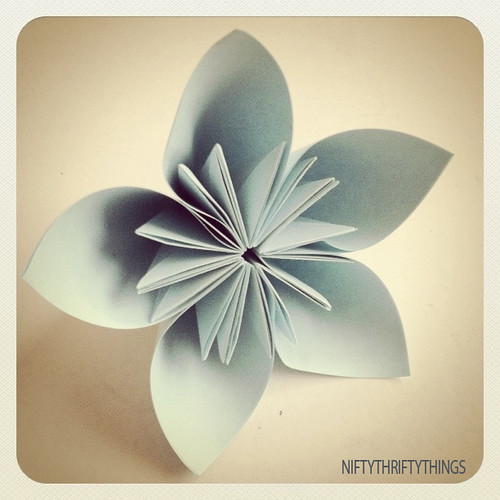
Beautiful Origami Flowers
-Mr Crafty
Friday, June 10, 2011
Root Beer Pork Chops
Yea, I thought the same thing. Root Beer and Pork? So I gave it a shot and it was surprisingly good. They complement each other very well. If you head on over to Weekly Meal Deal you can find the full recipe and details.
Hint: If you are a frequent target shopper you can snag Hormel Pork Chops for 3.49lb this week and Pepsi Product 12 Packs are Buy 3 Get 1 Diet Pepsi Free. This should save you some $$ when buying the stuff you need for this meal.
-Mr Crafty
Wednesday, May 25, 2011
Bunting Project
Bunting projects are always fun because one: they are fairly easy and two: they make versatile decor for festive occasions and the like. You can check out Discoverpaper for a full rundown on an easy paper bunting project.
-------------------------------------------------------------------------------------------------
I'd also like to add that every spring when the nicer weather kicks into high gear I begin my prop building projects for my Halloween display for the year (yes I am a bit of a nut over Halloween) So keep a look out later because I'll be posting some DIY decor and props projects.For those who are just as enthusiastic for Halloween as I you may want to check the Monster-List-Of-Halloween-Projects because they are by far one of the best go to sources for all DIY prop projects.
-Enjoy
Mr Crafty
Tuesday, May 3, 2011
Upcycled Newspaper Gift Bags: For Your Inner Eco-Maniac

When I bought something at a store recently, the clerk handed me my purchase in a bag made from a newspaper. I liked it very much and had to make some more—thus today's DIY recycled newspaper project: gift bags made from the Wall Street Journal. You can vary the dimensions, of course, but here's what I used to create a bag that's 5" tall, 4.5" wide, and 3" deep.

Stack two sheets of newspaper on top of each other. This will be a two-ply bag for extra sturdiness.
Cut out a rectangle that's 15.5" wide and 8.25" tall. If your paper already has a fold in it, align the existing fold with one of the fold lines in the diagram below, unless you don't mind an extra fold appearing somewhere on your bag. I cut out this rectangle, then flipped the paper over so the blue area would be on the outside of the
bag.Fold a flap 1.25" down from the top. Fold a flap 2" up from the bottom. Then measure off and make vertical folds in the places shown in the diagram above. The front and back panels are 4.5" wide, the side gussets are 3" wide, and you'll need a 0.5" flap for gluing the bag together.
Cut two pieces of cardstock or chipboard to 4.25" x 1", then glue them on the widest two panels just under the top fold. These will reinforce the rim of the bag. Glue the top flap down along the length of the bag, covering the cardstock. Since the bag is two-ply, you'll need to glue both flap pieces down one at a time.
Put glue on the outside of the 0.5" tab and bring the left-most panel over to form the body of the bag, aligning the cut edge of the panel with the folded edge of the flap. Add a little more glue to make sure the outermost sheet of newsprint gets tacked down, too
Open the bag so the 2" flap is now up. Fold the short sides inward as if you were wrapping a present. If it seems easier, you could also lay the bag on its side and crease those folds against the table

Put glue on both flaps and fold them inward to form the bottom of the bag. Standing the bag upright and pressing down from the inside will help to secure
them.Cut a piece of chipboard to 4" x 2.5" and glue it to the bottom of the bag to reinforce it and hide the flaps if you want to be an overachiever.

Punch holes in the rim of the bag, adding eyelets if you like, and string some cord through the holes to form handles. Knot each end of the cord so it won't pull out through the holes.
If you want to store your bag flat, pinch the top together, fold in the sides, and bring the bottom up so that it lies flat.
-Mr. Crafty
Thursday, April 28, 2011
Mason Jar Lanterns
I was navigating the net earlier and came across a recent DIY project that I couldn't resist. What I found was a versatile piece of decor you can use in or outdoors. I'm talking lanterns people. These are super easy to make, eco friendly, and used as an accent piece anywhere! You can head on over to Make-it-do.com for the full tutorial. I myself will be using these in my garden and yard as warm accents for low level lighting as well as a potential additive for my Halloween display.
Enjoy
-Mr. Crafty
Thursday, April 14, 2011
Mother's Day Projects: Picture Frame Jewelery Holder
PICTURE FRAME JEWELERY HOLDER

1) Choose an old picture frame and remove any backing. You can decorate the frame with paint, fabric or other appropriate decoration to match mom's bedroom or bathroom decor or leave it plain.
2) Cut a piece of window screen that overlaps the back of the frame 1/2 inch. (Remember when the dog charged through the screen and ripped it to shreds? If it's still lying around, here's the perfect use for it.)
3) Staple or nail the window screen to the back of the frame.
4) Screw in some cuphooks along the bottom of the frame to hold rings and/or in the top corners to hold necklaces and bracelets. Earring backs fit through the screen.
5) If you want the holder to hang, add a picture hangar to the back. Otherwise, it can sit on a small easel or rest against the wall.
Rock on mom!!!!
-Mr. Crafty
Thursday, February 24, 2011
Budget Spring Decor Idea: Thrifty Stylized Bulletin Board
This project takes 5-10 minutes, and only cost me $5.25 – $5 for the frame at a thrift store and $0.25 for the bulletin board at a thrift store. Not bad, eh?
YOU WILL NEED:
- An old bulletin board, big enough to fit your frame
- Any picture frame you think is interesting or beautiful (NOTE: make sure it has a front-to-back depth large enough to contain the thickness of the cork board you will be using.)
- A tape measure
- Pencil
- Some kind of cutting device (I ended up using a bread knife.)
Directions
1. Measure the inside of your picture frame. Give yourself more room to work with than the tape measure says: for example, if one length of the inside of the frame is 10″, actually use a measurement of 9 3/4″ or something of the like.
2. If there is any kind of border around your bulletin board, snip and pull it off.
3. Using a ruler, trace out the (adjusted) dimensions of your picture frame onto the bulletin board.
4. Cut along the lines you drew. You may have to shave off a bit more from one side or the other if it doesn’t quite fit into your picture frame. Once you get it in the frame, fold down the metal flaps (or staples, etc. – whatever would usually hold the glass, photograph and backing into the frame) to hold the cork board in place.
And just like that you're done!!!!!! Here's my finished product.
-Mr. Crafty
Wednesday, February 2, 2011
Super Savings!!!!!
Click hereto print your weekly coupons for AC Moore:- 40% off any one Regular Priced Item
- 55% off Frame Shop
Coupons valid 1/30/11 - 2/5/11.
Click here to print your coupon for - Buy 1 Entree Get the 2nd One 1/2 off. Coupon expires 2/8/11.Happy clipping
-Mr. Crafty


